DIY Barn Quilt from Start to Finish
My friend Maura wrote about her DIY barn quilt in this blog post. I hope you can be inspired by the project she and husband completed for their home.
The Osborn Family barn quilt story:
Are you familiar with barn quilts? I had never heard of them until they started popping up on barns locally. I just love them!
I love the colors, the different designs, the largeness of them, and the character it brings to the landscape.
I was recently searching pinterest for barn quilts and how to make them and came across a picture of a smaller one that someone hung on their front porch near their front door. I was like…what what…game changer!
I don’t very often think outside of my teeny tiny little box and that’s why I find pinterest to be so AMAzing! I never thought about making a barn quilt and shrinking it down to put somewhere on the outside of our home…I mean I know they are called “barn” quilts BUT seriously I thought…why not on the house!
It didn’t take me long to figure out this was a project I definitely wanted to tackle and the first thing I always do is enlist my hubby’s help and I do that because…well…he’s pretty much FABulous at any kind of project and I just enjoy doing things with him…besides Nascar…I really do not enjoy watching Nascar with him. Anyway, I’m a blessed girl!
I did a bit of research on pinterest and found DIY instructions that I thought were easy to follow. I found a simple pattern. You will definitely want to find a pattern before you get your supplies as you will need to know how many different paint colors you will need.
You can find all kinds of patterns either on pinterest or you can also google barn quilt patterns and there will be a plethora to choose from. After I had a plan, we set out to Lowes to buy the supplies. It was kind of a date for us…we use any excuse to leave the locker room for time alone together!


Plywood:
The first thing we looked for was plywood! Who knew there were so many different grades of plywood. It's actually kind of expensive to buy a whole sheet so we asked the Lowes associate if there was a smaller option available to us and sure enough there was.
You can buy plywood in smaller squares ranging in several different sizes...I had no idea…BUT I don’t necessarily spend my free time down the plywood isle at Lowes either. We decided to buy a 4’x4’ sheet of plywood but for our purposes we thought that was still a bit big so we had them cut it down to the size we wanted.
For our project we went with a 3’x3’ piece so we could use it as a focal point at the front of our house. We also bought a 2’x2’ piece to go at the back of our house…ya know to keep everything cohesive and all. And let me tell you that Lowes has a pretty nifty saw they use to cut down your plywood…my hubby was drooling…not really but really.
Truly my husband could’ve done this part but we were there and why not get sawdust everywhere at Lowes and NOT in our garage. It was just better to kill two birds with one stone…ya know what I mean! Plus, that meant we could get going on the painting process ASAP! Win win!
Paint:


The second thing we did was pick out paint colors. Now you can do this however you want. Personally we are geared more towards colonial colors and tend to gravitate to them every.single.time, but I have seen barn stars that are very bright and colorful and look fantastic.
You choose whatever color scheme you’re going for and again pinterest is a great way to get inspiration. Our pattern called for four colors and we chose to go with Lowes paint samples.
We bought samples at Lowes but used Sherwin Williams colors. The red is Fireweed (SW6328), the white is Origami (SW7636), and the blue is Dark Night (SW6237).
I believe you can get these color cards at the Sherwin Williams store and take them into Lowes to have them color matched. You might even just need these numbers to give to the Lowes attendant.
Also, we searched for a pattern on pinterest that we liked and then my husband just duplicated it. If you google “barn quilt pattern” you should be able to find a free printable or download to use.
We also bought a can of acrylic spray paint in clear so that the star will be protected in the elements. All of the supplies cost us $48.13! I was pretty excited considering if you purchased one of these I’m sure it would cost three times as much!
Time to Get Started:


Once we got home we started right away.
My husband kind of ended up taking over this project! I am not very detail oriented and I’m also NOT a painter…for realz! I get it on the floor…on my clothes…it splatters…it’s not pretty!
My husband however is very much a perfectionist when it comes to details so I just let him go to town. He first covered the 3’x3’ piece of plywood in a white primer. The location we are going to put our barn star could, in fact, see quite a bit of weather so we wanted to be sure that the wood was completely covered.
You can decide if this is necessary for you! He then drew the design with pencil. He loved this part…he went to 2 years of college to be an architect so geometry and math and such makes him happy…I was certainly glad that he was excited about doing it because that’s just not my thing folks!


After he primed the wood and drew the design he then started masking the geometric pieces so he could start painting in color.
So here’s a tip…GET FROG TAPE!
We used an off brand masking tape and when we pulled it off there were slight imperfections in the paint. Because this is a giant quilt piece and because clean lines are pretty important, you will want to invest in the good stuff! Trust me on this!
Did I mention that Jason (that’s hubby’s name) is a master masker of tape! This part of the process took several days as we had to mask and re mask for each color and then on top of that we did several coats of each color! In the end though we were thrilled with how it turned out!


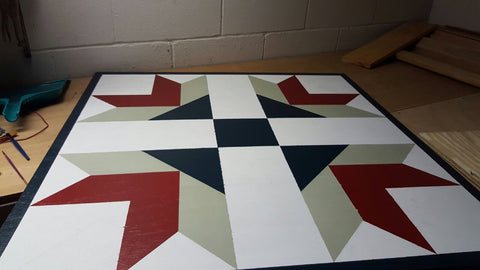
After my husband finished the big square, he let me loose with the smaller 2’x2’ square. He did in fact draw the design…a very simple one but I did mask AND paint! I was pretty proud of myself.
However, it was his idea to get all fancy and draw our last names initial in the center…sort of like a monogram.

These could become a little addicting. It was very therapeutic…when I was involved, that is;) It will be very satisfying when we pull into our drive to see the finished product.

Hopefully you enjoy this project as much as we did. Have fun with your barn quilt. Email us - we'd love to see a picture!
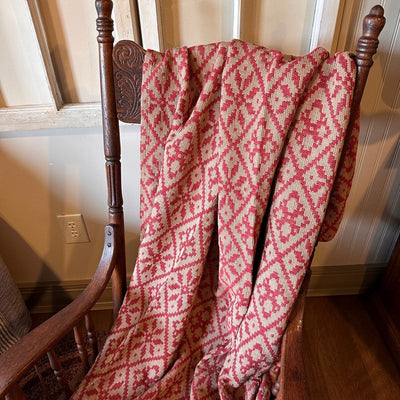
If you would like to enjoy quilts on the inside of your home, Primitive Star Quilt Shop has several quilt collections for you to choose from.
Updated 2023: This topic is so interesting to us here are the quilt shop as We've been Exploring the Colorful History of Barn Quilts in America.
We had the opportunity to design, paint and display our very own barn quilt on the side of our downtown shop. You can read all about it in our article.